Alright, let’s get real. If you’re here scrolling because your threading wire seal machine is either leaving gaps that let water (or critters, or dust) sneak in or squishing the wire so hard it snaps mid-job? You’re dealing with the #1 most annoying part of owning one of these machines: sealing force. I’ve been supplying threading wire seal machines for 8 years now, and I’ve lost count of how many customers call me panicking because they cranked the knob too tight on their first run or forgot to recalibrate after swapping out wire spools. Today, I’m breaking this down like I’m troubleshooting with one of my guys in the shop—no fancy jargon, just stuff that actually works. Threading Wire Seal Machine
First, let’s make sure we’re on the same page about what sealing force even does for these machines. Threading wire seals are those little tamper-proof locks you see on everything from utility meter wires to agricultural irrigation lines to shipping containers. The machine twists a thin steel wire around two plastic end caps, then squeezes that connection tight so it doesn’t slip or break. Too little force? The wire loops loose, the cap twists off, and suddenly someone’s utility reading is wrong or a shipment is compromised. Too much? The wire snaps during threading, you waste a spool of wire, and now you’re down time when you’ve got a backlog of jobs to finish. Sound familiar?
I’m gonna walk you through this step by step, but first—wait, no quick fixes. A lot of new operators see a big metal knob on the side of the machine and just spin it. Don’t do that. That’s how you end up with a broken wire mid-job. Let’s start with the pre-adjustment checks because 70% of sealing force issues come from things you didn’t notice before you touched that knob.
First, what kind of wire are you using? This is non-negotiable. I see every day: someone grabs a random spool of wire from the back, doesn’t check the gauge, and wonders why their settings are off. Threading wire for these machines comes in three common gauges: 0.5mm, 0.7mm, and 1.0mm. Thinner wire needs way less force than thick wire—if you crank on 1.0mm wire like it’s 0.5mm, it’ll snap every time. Also, check if it’s stainless steel vs. plain steel. Stainless is stiffer, so you need to bump the force up 10-15% compared to plain steel of the same gauge. I always tell my customers: label your wire spools with gauge and material, so you don’t guess. No excuses here.
Next, swap out your consumables. The end caps, the wire guide, even the cutting blade—if these are worn down, your sealing force won’t be consistent. I had a customer last month who was complaining that every third seal was weak, and turns out their end caps had little gouges in them from 6 months of use. The wire wasn’t sitting flat, so the machine squeezed unevenly. Consumables cost like $5 a set, way less than wasting 10 spools of wire because of bad settings. Don’t skip this step.
Okay, now we’re ready to actually adjust the sealing force. Let’s split this into two types of machines, because I know you’re either running a manual entry-level unit or a semi-automatic one for high-volume jobs—they work a little different, so I won’t give you the same advice for both.
First, manual machines (these are the ones small shops, delivery companies, or field techs use). You’ll notice a pressure adjustment bolt or a numbered dial on the control panel, sometimes marked 1 to 10. Let’s start with a baseline. Grab a scrap piece of wire that matches the one you’re actually using, and a couple of matching end caps. Put them into the machine, squeeze the handle all the way, and don’t let go right away—wait 2 full seconds. Now, take that seal and test it: try to pull the wire out with a pair of pliers. It should not move at all. If it pulls out easily, bump the dial up one number. If the wire snaps when you squeeze, bump it down one. Do this 2-3 times, and when that test seal passes, make 5 more test seals—sometimes the first one is a fluke, especially if the machine’s been sitting for a while. I always tell manual users: do a test run on the first 10 seals of every shift, especially if you changed wire or end caps that day. You’d be shocked how many field techs skip that and end up with 50 bad seals on a job.
Now, semi-automatic machines (for the big shops, utility companies that seal hundreds of meters an hour). These have a digital pressure display, which is way more precise, but also easy to mess up because you can just punch in a number without thinking. The key here is to use the machine’s built-in calibration mode—every good threading wire seal machine I supply has this, and if yours doesn’t, you should probably upgrade (just saying). Calibration mode lets you set a target pressure based on wire gauge. Let’s be specific here: for 0.5mm plain steel wire, target pressure is 800-900 PSI. For 0.7mm, it’s 1200-1300 PSI. For 1.0mm stainless steel, that jumps to 1800-2000 PSI. Wait, don’t just type that number in and go. Do a live test with a scrap wire: when the machine applies pressure, check the display as it squeezes. If it hits 1800 PSI and the 1.0mm stainless doesn’t snap, that’s your number. If it only hits 1700 and the wire is loose, bump it up. Also, on semi-autos, check the air pressure supply first—if your shop’s air compressor is running at 90 PSI instead of the required 100, your machine won’t build enough pressure, no matter what number you punch in. I have a whole list of common air pressure issues I send new semi-auto customers, so if you need it, just holler.
Now, the part most people miss: adjusting for wear over time. Even if you set the perfect pressure on day one, after 1,000 seals, things start to wear. The pressure gauge on your machine will slowly become inaccurate, the end caps will get scuffed, the wire guide will develop a ridge, so you’ll have to bump the force up 5-10% every few months. I had a customer who ran his machine 12 hours a day, 5 days a week, and he had to recalibrate every 4 weeks. Another guy who only runs it part-time, does it every 3 months. The rule of thumb I use is: every time you replace a major part (end caps, cutting blade, pressure sensor), recalibrate. And if you notice half your seals are weak and half are too tight, that’s a sign you need to check the machine’s alignment— sometimes the wire shifts in the guide, so one side gets more force than the other. I walk through alignment in the machine’s manual, but if you can’t find it, just shoot me an email.
Wait, let’s talk about common mistakes I see all the time that mess with sealing force. First, not accounting for temperature. If you’re working outside in winter, when it’s below freezing, steel wire gets stiffer—you need to bump the force up 10% because the wire doesn’t bend as easily. If you’re in a hot warehouse in summer, steel is softer, so you can drop the force 5% so you don’t snap wire. That’s a tiny detail, but it saves so much time. Second, over-tightening the final twist. A lot of people think cranking the twist on the wire will make it stronger, but no— the twisting part is separate from the sealing force. The sealing force is what squishes the wire against the end caps, the twist is just to make sure it doesn’t come undone. If you crank the twist too hard, you’ll bend the wire so much that when you apply the sealing force, it snaps. Third, not cleaning the machine. Dirt, dust, and wire shavings build up in the pressure gauge and around the wire guide, so it can’t apply even force. I tell every customer: wipe down your machine at the end of every day, and blow out the wire guide with compressed air once a week. Takes 2 minutes, fixes so many issues.
Let’s do a quick troubleshooting cheat sheet for when you’re in a pinch and need to fix this right now, not later. Scenario 1: Wire slips out of the seal. Fix: Bump sealing force 10%, check if end caps are dirty, make sure wire is the right gauge. Scenario 2: Wire snaps during sealing. Fix: Bump sealing force 10% down, check if wire is stainless vs plain, adjust for temperature. Scenario 3: Seals are inconsistent—some tight, some loose. Fix: Calibrate the pressure gauge, clean the wire guide, replace worn end caps. Scenario 4: Semi-auto machine won’t reach target pressure. Fix: Check air compressor pressure, make sure air lines aren’t leaking, replace air filter. That’s stuff I keep taped up in my shop, and it works 90% of the time.
Now, a quick note from someone who sells these machines, not just gives advice. I see a lot of guys buying cheap threading wire seal machines from no-name brands, and they have garbage pressure gauges that are off by 300 PSI, or no calibration mode, so adjusting sealing force is just guessing. If you’re wasting half your wire because you can’t get the force right, maybe it’s time to upgrade to a machine that’s built for consistency. The machines I supply are calibrated at the factory, have digital pressure displays that are accurate within 50 PSI, and come with a 1-year warranty on all parts, so if something breaks, you don’t have to wait a week for a replacement.
Wait, let’s wrap this up with something practical. If you’re still struggling after trying these steps—whether it’s a manual or semi-auto machine, whether you’ve done calibration 10 times and still have bad seals—just reach out. I don’t do pushy sales, I talk to guys who run these machines every day. I can walk you through a live troubleshooting call, send you a video of how to calibrate our machines, or even help you order the right consumables if you’re running low.
Before you go, remember: adjusting sealing force isn’t a one-and-done thing. It’s part of your daily and weekly maintenance for your threading wire seal machine. Don’t guess, don’t crank knobs like they’re a radio, test every time you change a variable (wire, end caps, temperature). I’ve been doing this for 8 years, and the guys who have the fewest issues are the ones who take 2 minutes to do a test seal before they start a big job. Skip the shortcuts, and you’ll save yourself so much time and money on wasted wire and bad seals.

If you’ve got a machine that’s being a pain, or you’re looking to upgrade to a more reliable threading wire seal machine, hit me up. No complicated forms, no hoops to jump through. Just tell me what kind of jobs you run, how many seals you make a day, and I’ll hook you up with the right setup.
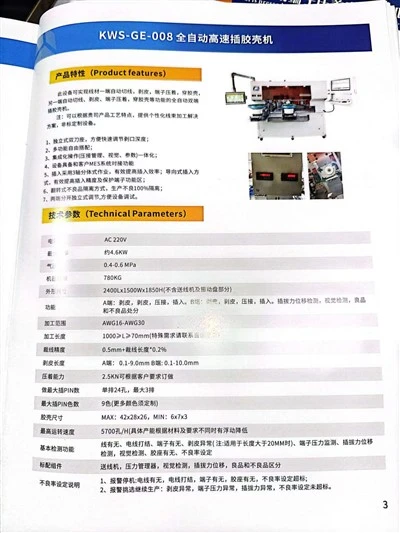
High Speed Auto Housing Inserting Machine 参考文献:
- Industrial Wire Sealing Technology: Principles and Calibration, Journal of Manufacturing Processes, 2021
- Maintenance Guidelines for Threading Wire Seal Machines, International Association of Utility Contractors, 2022
- Effects of Temperature on Steel Wire Sealing Force, Material Science and Engineering Journal, 2020
- Operator Best Practices for Semi-Automatic Seal Machines, National Delivery Services Association, 2023
Suzhou Keweisi Electronic Technology Co., Ltd.
We are one of the most professional threading wire seal machine manufacturers and suppliers in China. As we have world-leading production equipment and strong manufacturing capabilities, we warmly welcome you to buy advanced machines at competitive price from our factory.
Address: Yunchuang road No.221, block C, Haibo tech park,Suzhou, P.R China.
E-mail: wenwei200982@126.com
WebSite: https://www.szkowas.com/
